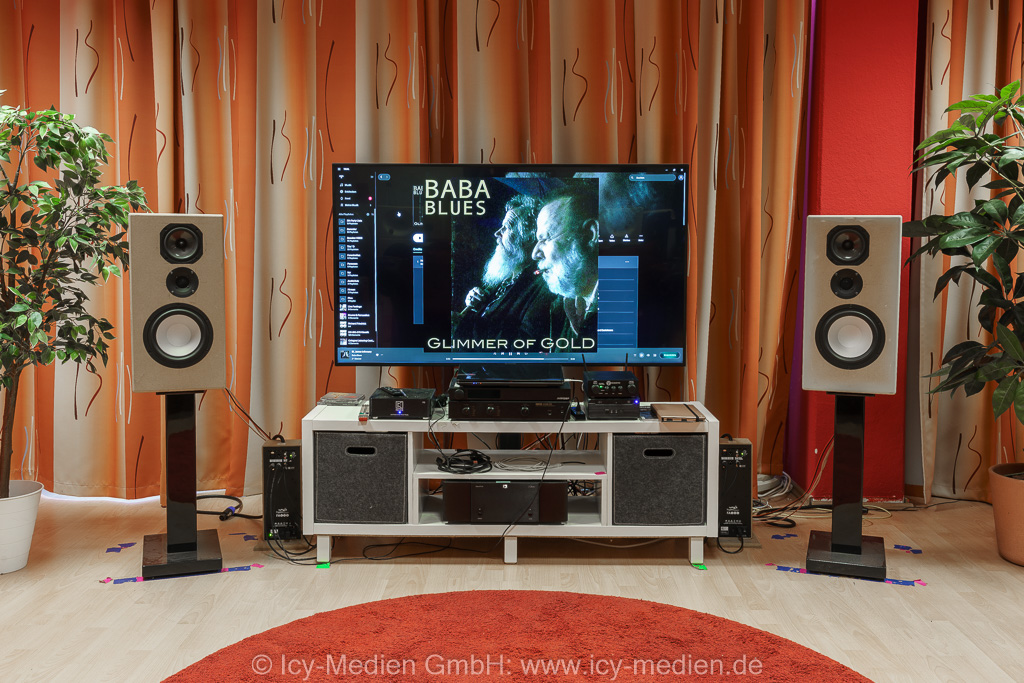
A highly interesting all-in-one DSP amplifier from the U.S. the ACOUSTAS AC650DSP
Click here for the German version
Anyone familiar with us knows that we`ve long been advocates of active speakers with DSP crossovers - we first presented our reference system designed this way (see article) at the HiFi-Musik-World 2004 in Wetzlar.
Such systems have the advantage that:
- not only the speaker itself but the entire speaker/room system at the listening position can be equalized
- the amplification load is distributed across multiple amplifiers (ideally, each with independent or independently buffered power supply)
- the amplifiers can be adjusted to the required power or the required "speed"
- multiple setups can be saved (e.g., for different music or mixing styles, with or without loudness, etc.)
In the past, such systems were very large due to the amplifiers, often required a preamp for volume control and source selection, usually offered only analog inputs and you had to switch the setup on the device itself.
Today`s home entertainment trends favor more compact solutions with multiple digital inputs (USB, optical, coaxial), streaming capabilities via Bluetooth, and control via smartphone or tablet.
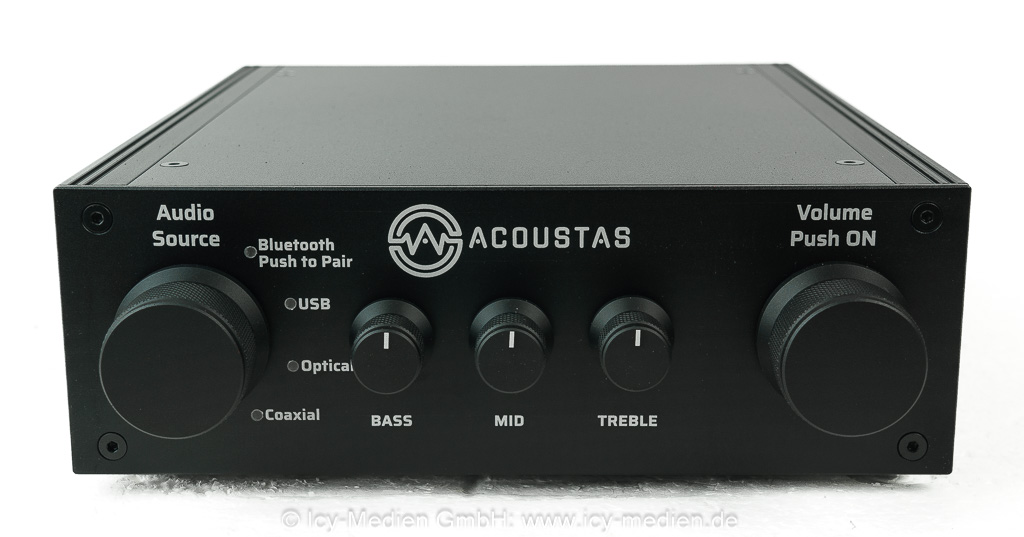
One such device is the ACOUSTAS AC650DSP, which is just 229 mm wide, 66 mm high, and 178 mm deep. It can process up to 10 channels via DSP, 6 of which are amplified internally (54 watts per channel at 4 ohms or 40 watts per channel at 8 ohms). If you need more power in a particular channel, simply connect more powerful power amplifiers or active subwoofers to the other outputs.
In Part 1 of our review, we take a closer look at the features of the AC650DSP (and the accompanying software AirDSP). In Part 2, we`ll show you how easy it is to use it to set up a 3-way system, for example, and achieve a perfect step response.
To understand the genius of the combination of the AC650DSP and AirDSP, you need to take a look at what has happened in the field of "speaker activation for DIY enthusiasts" over the past 20 years or so.
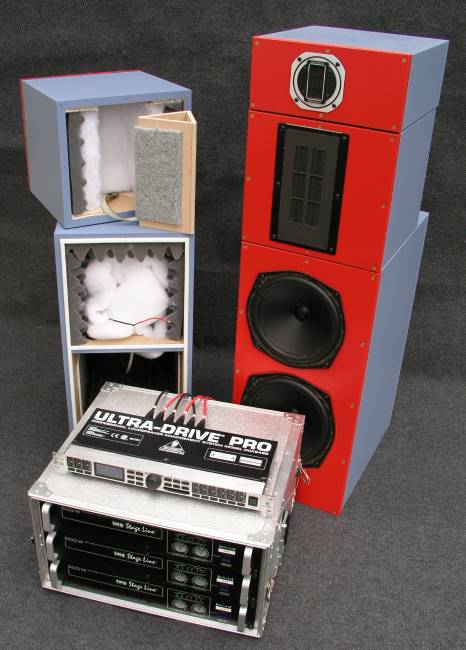
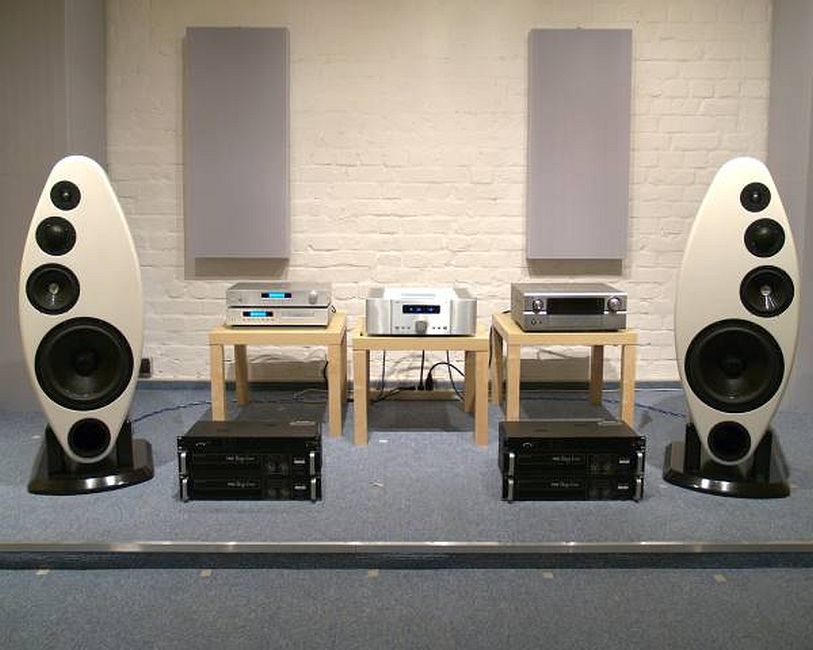
In our first reference system (3-way, left image), the electronics in 2004 were still very bulky (3 stereo power amplifiers (2U each) and a speaker management system (1U)) and heavy (approx. 50 kg). In our second reference system (4-way, right image), as of 2007, there were even 4 stereo power amplifiers and 2 speaker management systems with a total weight of up to 80 kg:
Class-D power amplifiers weren't very good back then, and speaker management systems with 2 inputs and 8 outputs (2in/8out for short) were scarce and very expensive.
A lot has changed since then, especially in terms of electronics:
- The first major "breakthrough" came with the availability of Class-D power amplifiers and speaker management systems with 4-in/8-out in a 1U chassis. Here`s a picture of Piwo`s party PA from the first subscriber meetup (see report). The electronics (2x MONACOR STA-2000D and 1x MONACOR DSM-480LAN (total weight 16 kg, half the volume)) is outlined in red:
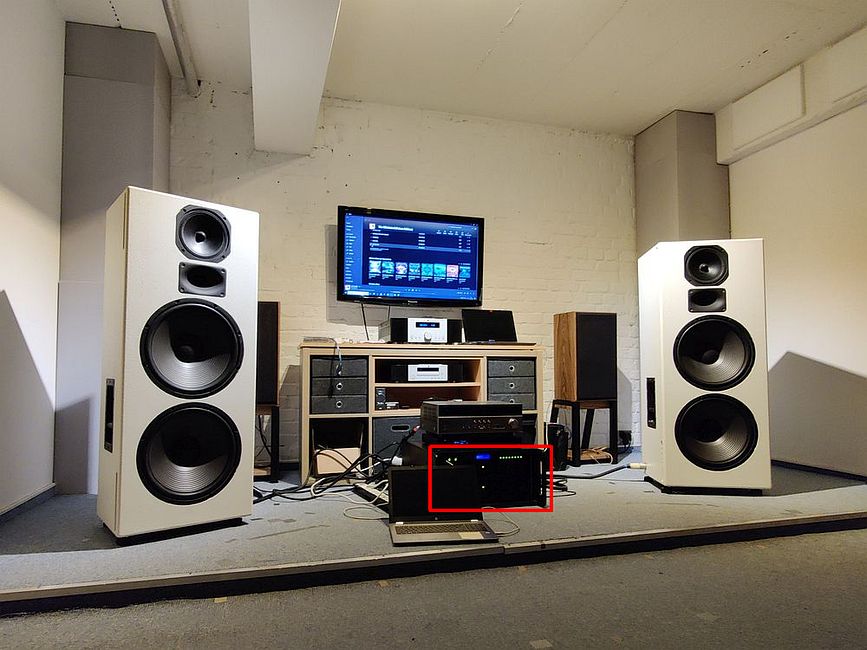
- For more affordable/smaller systems with lower power requirements, we have often recommended (discontinued) AVR receivers with external inputs since around 2010 either with a speaker management system or even a multichannel audio interface + PC + software as the music source (such a solution is shown in the image above on the electronics unit outlined in red). Here, the volume control via remote control is located BEHIND the DSP just as it should be (in the previous systems, this was always IN FRONT OF the DSP, see article)
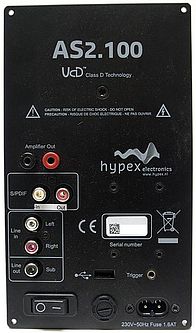
- In 2009, at ProLight & Sound, we discovered a small (200 mm high, 115 mm wide, 60 mm deep) DSP plate amp from HYPEX, the AS2.100 (see article) - one of the first DSP plate amps available to DIYers with more than two channels. It allowed you to filter and equalize either a 3-way speaker (mono) or a 2.1 system. It featured two 100-watt amplifiers at 4 ohms but for the third channel, you still needed an external power amplifier (or an active subwoofer). It even came with a remote control . . .
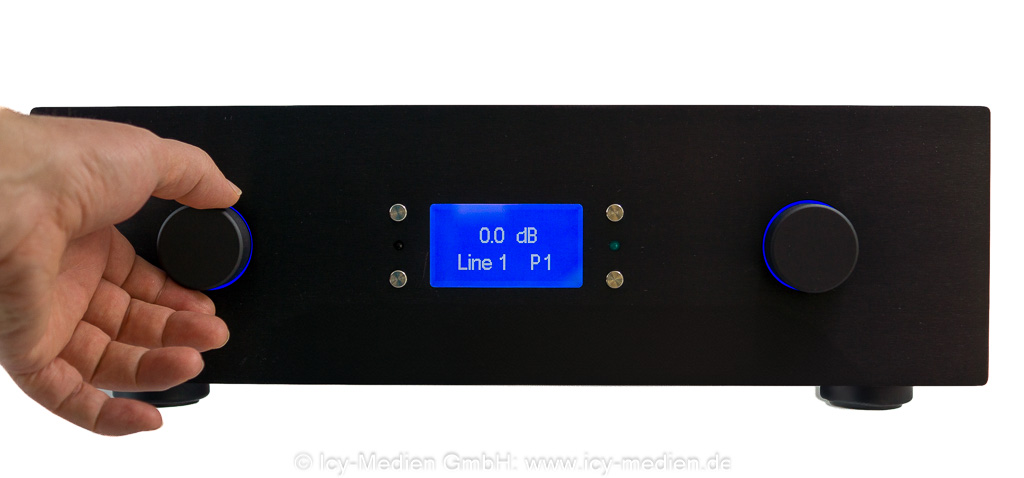
- Around 2013, Sitronik Industrie launched the Lucius, an integrated DSP amplifier with up to 6 integrated, scalable amplifiers (e.g., from ICEpower). It was also sold under the brand name Audaphon by Lautsprechershop (see, e.g., review in Klang & Ton 6/2013, p. 12ff) or by us (see MindAudio Control Center A3). The Lucius could be operated like a "normal" amplifier (source selection (left knob), volume (right knob)); in addition, three presets were available, and the entire system could also be controlled via remote control - it couldn`t have been more convenient or compact at the time and that with up to 3 kW of total amplifier power!
- In 2017, HYPEX launched its FusionAmp family, a combination of high-quality DSP technology (ADAU 1452) and state-of-the-art NCORE® Class-D amplifiers. Finally, high-quality DSP plate amps with three built-in amplifiers - ranging from 125 to 500 watts per channel at 4 ohms - were available to DIY enthusiasts.
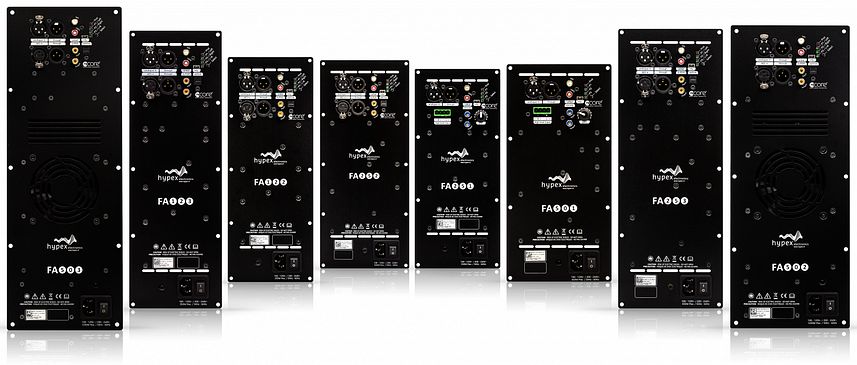
Source: https://www.hypex.nl/ - In the PA sector, there are an increasing number of affordable, multi-channel DSP amplifiers, such as:
- the t.racks DSP 4x4 Mini Amp (see article) for only €195
- the t.racks DSP 4x4 Amp 4.250 for €429
- the t.amp Quadro 500 DSP for €579
- OMNITRONIC MTC-3204DSP for €799.
But 4 channels is usually the limit, and there`s no remote control in the PA sector anyway . . . - In 2025, Andreas Heggendorn released the FIR-BoxX, which is just 340 mm wide, 100 mm high, and 300 mm deep. It combines a Raspberry Pi (which applies the FIR filters to be generated in real time with up to 65,536 taps per channel) with an 8-channel "sound card" and 8 DAC amplifiers (30 watts each at 4 ohms or 25 watts at 8 ohms) in an attractive enclosure. When (almost) fully assembled, it costs €2,299; those who want to assemble it themselves save €600. It features 2 analog (RCA) and 2 digital (TOSLINK) inputs, and the amplified outputs are routed to the outside via 4 SPEAKON jacks.
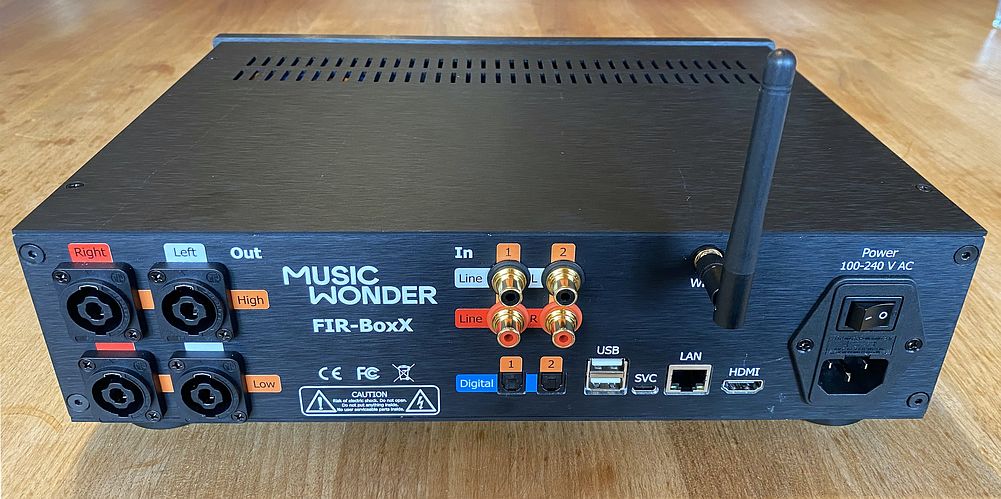
Source: https://fir-boxx.com/bauanleitung.phpThis 337-page, 61.5 MB PDF (see link) provides a step-by-step guide on the best approach for creating FIR filters for the FIR-BoxX.
And here are two concise descriptions of the differences, as well as the advantages and disadvantages, of IIR and FIR filters (see Link 1, Link 2).
ACOUSTAS AC650DSP
And right now, we`re testing the ACOUSTAS AC650DSP - and that`s only because one of our subscribers asked us if we were already familiar with the AirDSP software. We weren`t familiar with the software yet, but found it very interesting. "Unfortunately", though, it only works in conjunction with the AC650DSP. So we wrote to ACOUSTAS - and they actually lent us a unit to test. We are very grateful for this.
Hardware:
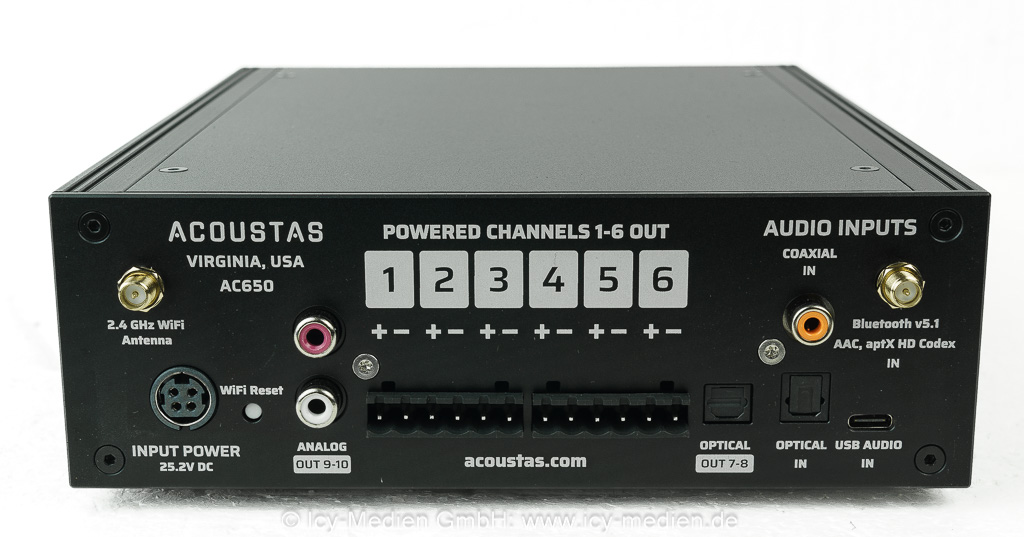
The AC650DSP is very compact (only 229 mm wide, 66 mm high, and 178 mm deep), weighs just 1.6 kg (+ 850 grams for the external power supply (25.2 VDC, 10A)), and features exclusively digital inputs (Bluetooth, USB, optical, coaxial). It features 6 built-in power amplifiers, each delivering 54 watts into 4 ohms or 40 watts into 8 ohms, and can connect to external amplifiers via 2 RCA outputs and an optical output (e.g., for external active subwoofers or if the built-in power amplifiers in a particular channel are too weak). IIR filters can be applied to all 10 channels (high-pass and low-pass up to 48 dB/octave + 15 EQs). Additionally, in the FIR profile (48 kHz sampling rate), 1,500 taps can be applied per channel - except on the optical output. If you can or want to do without the FIR filters, there`s also the Rich profile (96 kHz sampling rate) and the Pure profile (192 kHz sampling rate). The latter will please high-end enthusiasts, since most DSPs only run at an internal sampling rate of 48 kHz - which naturally leads one to wonder why to invest in expensive high-res downloads . . .
On the back panel, there are connectors for a Wi-Fi antenna, a Bluetooth antenna, the external power supply, and the input and output channels. The speakers are connected using the included Phoenix terminals (wire ferrules are included) - so the snobbish high-end audiophiles will miss their nextgen™ WBT terminals . . . In fact, however, the Phoenix terminals are significantly better than their reputation:
- Rated current 12 A at a rated voltage of 320 V (that would be 3,840 watts)
- Contact resistance 1.3 mOhm (0.0013 Ohm)
- Rated cross-sectional area up to 2.5 mm² Once the connections are made, you can`t swap the channels anymore (except for left and right) ;-)
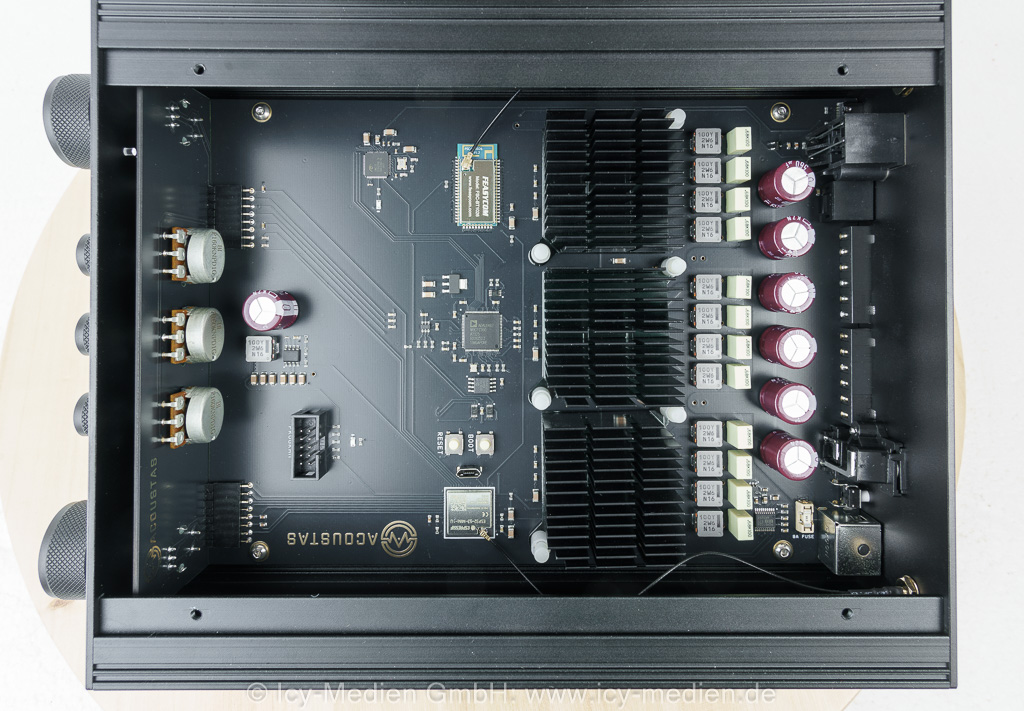
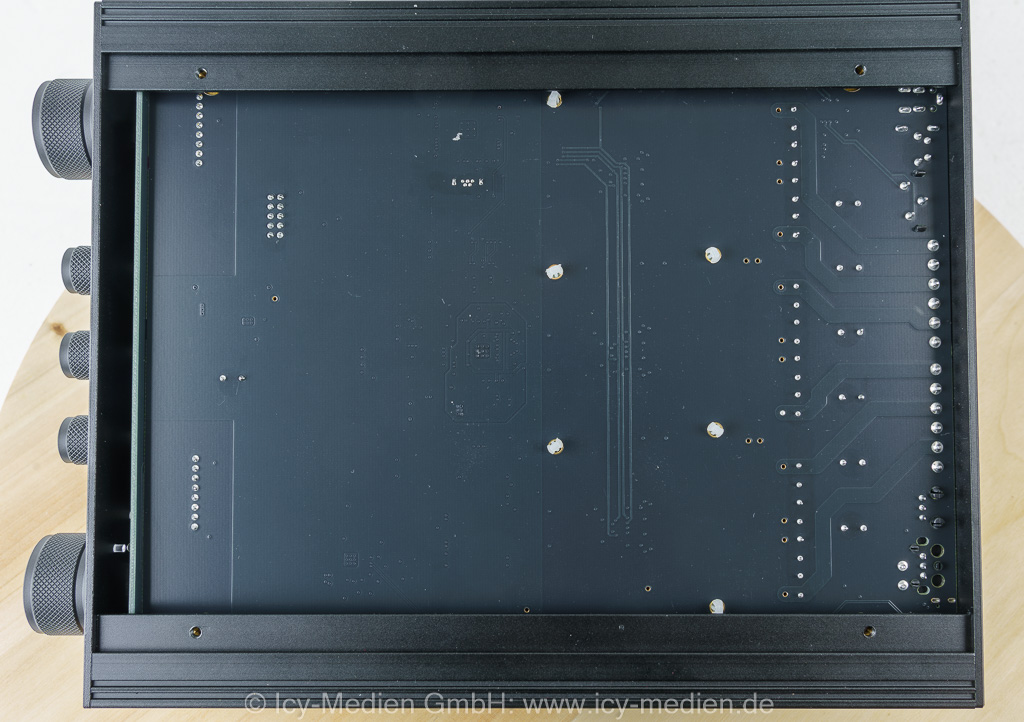
Here`s a look inside the very tidy AC650DSP:
A photo from "below" - thanks to the 4-layer circuit board, there's hardly anything to see ;-)
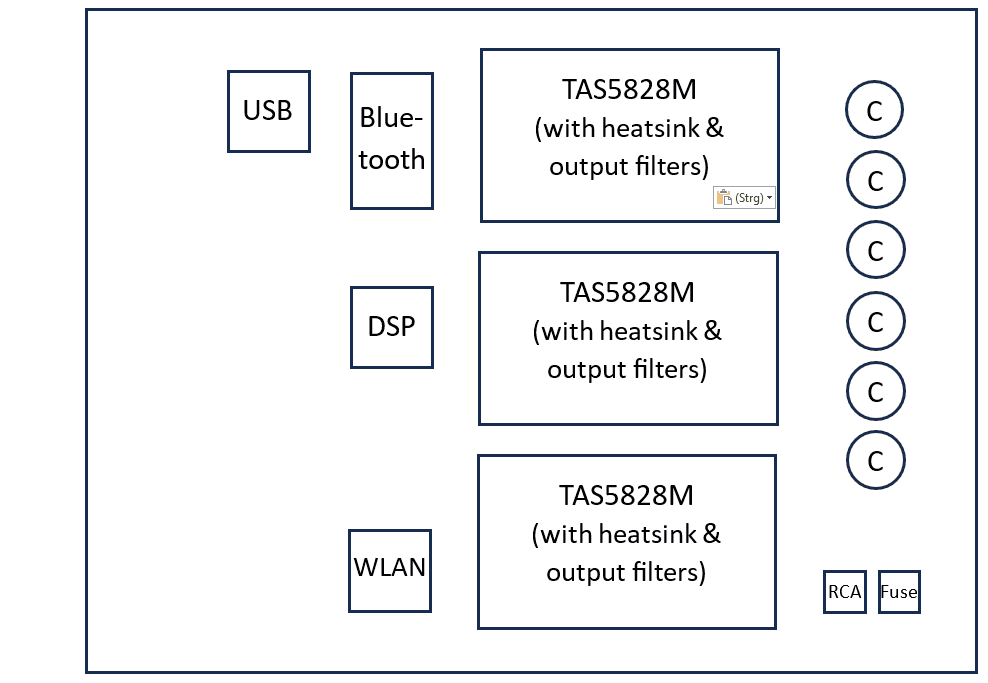
The "main components" of the AC650DSP are:
| USB receiver | CMEDIA CM6212 |
| Bluetooth module | FEASYCOM FSC-BT1026D |
| Wi-Fi module | ESPRESSIF ESP32-S3-MINI-1U |
| DSP module | ANALOG DEVICES ADAU1467 |
| Power Amplifier Module (3x) | TEXAS INSTRUMENTS TAS5828M (Stereo Class D) |
| DAC for RCA output | TEXAS INSTRUMENTS PCM5102A |
Here is a block diagram of the AC650DSP:
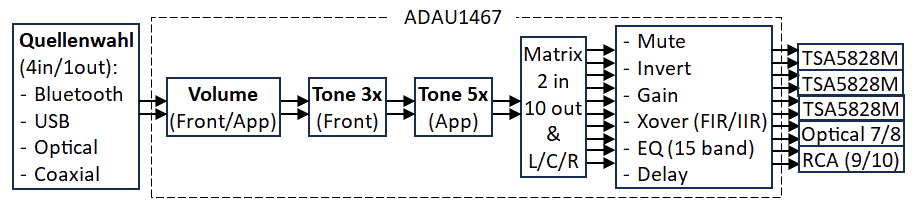
- First, the overall volume is adjusted
- Then come the "external" (Front, +/- 9 dB) and "internal" (App, +/- 12 dB) tone controls
- Up to this point, both channels are treated identically. Afterward, the 2 channels are split into 10 channels
- Each channel can be inverted, delayed, and attenuated, as well as filtered (IIR and FIR) and equalized
If you look at the block diagram above, the digital input signal can:
- be boosted by up to 9 dB using the tone controls on the front panel,
- be boosted by up to an additional 12 dB using the tone controls in the app, if desired,
- be boosted by up to an additional 12 dB via the 15-band EQ in the app, if desired
Well, having the tone controls turned all the way up at full volume isn`t a good idea even with "normal" amplifiers - they aren`t designed to handle that without distortion. So how does this work with the AC650DSP?
- If you feed a fully modulated 1 kHz sine wave (= 0 dB) into the AC650DSP via the USB input, set the volume to 0 dB, and set all tone controls, filters, and EQs to "linear," a voltage of approximately 2 Vrms will be present at the RCA jacks. This corresponds roughly to the maximum output signal of the TEXAS INSTRUMENTS PCM5102A D/A converter. If you then increase the level by 1.8 dB using the mid control on the front panel, the total harmonic distortion rises to approximately 8% - resulting in clipping.
- If you feed a fully modulated sine wave sweep (= 0 dB) into the AC650DSP via the USB input, set all tone controls and filters to linear, and boost only one EQ band for example, at 100 Hz by 10 dB (Q = 5), the signal sounds briefly distorted at volume levels of -10 dB or higher.
- When playing music, the volume can be set significantly higher than -10 dB under the conditions described above without any audible distortion, since broadband music only briefly excites the elevated range with a portion of its total energy, and the PEQ does not fully settle into its response.
Overall, the gain structure of the AC650DSP appears to us to be designed for practical use. With our 3-way test speaker (see below), a high overall volume can be achieved, which makes listening to Yello a lot of fun . . .
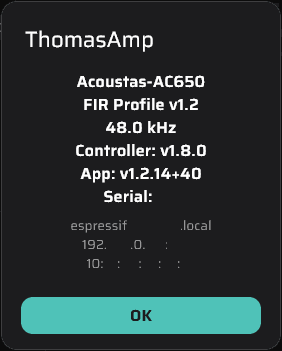
Note: Our amplifier was tested with firmware version v1.8.0.
AirDSP - the software for controlling the AC650DSP:
To ensure that the hardware`s wide range of features can be used easily and intuitively, there`s the AirDSP software - after all, what good is the best hardware if you can`t use its features conveniently? The software is available on iOS (iPhone & iPad), Android (phone & tablet), macOS (Apple Silicon & Intel), and Windows (Windows 10 or 11) - only Linux fans are left out. Unfortunately, the software currently only works when the hardware is connected - but the folks at Acoustas plan to add a demo mode in forseeable future.
Note: We began our test with software version v1.2.13+37. Shortly thereafter, version v1.2.14+40 was released, which already incorporated some of our feedback. During the course of the test, we identified additional issues that will be addressed in version v1.2.15.
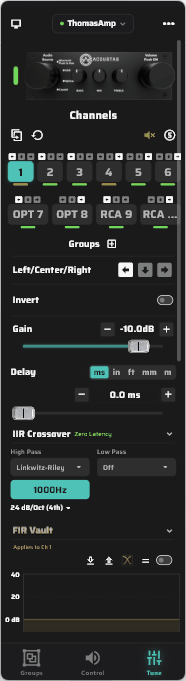
In fact, the software is very easy to use via a smartphone, as the functions are organized into three sections (Groups, Control, Tune (top/bottom)). Up to 8 presets (each with its own icon) can be selected with the press of a "button".
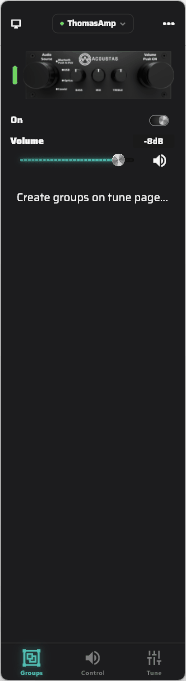
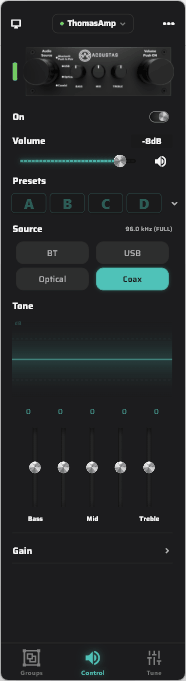
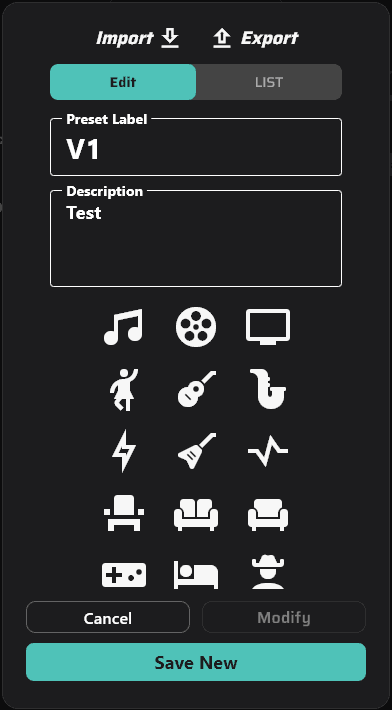
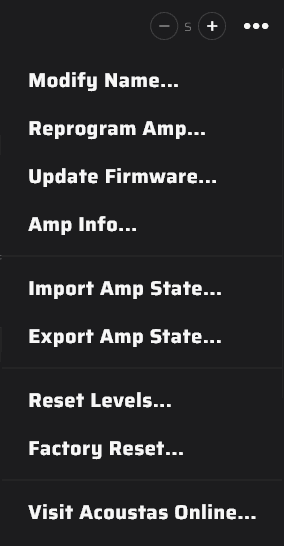
If you press and hold a preset button, you can change the label, description, and icon, save the changes via "Save New", or export them to a text file (file extension ACP) via "Export" (left image). If you want to save all amplifier settings and presets to a text file (file extension ACS), you can do so in the "..." menu in the upper right under "Export Amp State..." (right image).
Tone controls on the AC650DSP (front):
In addition to the standard controls for source selection (left) and volume (right), there are three "tone controls" on the front panel: here, the range below 200 Hz (bass), around 1 kHz (mid), and above 3 kHz (high) can be adjusted by up to +/- 9 dB - for example, to quickly "spice up" muffled or bass-deficient recordings, or to replicate the effect of the loudness button at low volumes (see Equal-loudness contour) - for example, by boosting the bass and, if necessary, the treble, and cutting the mids.
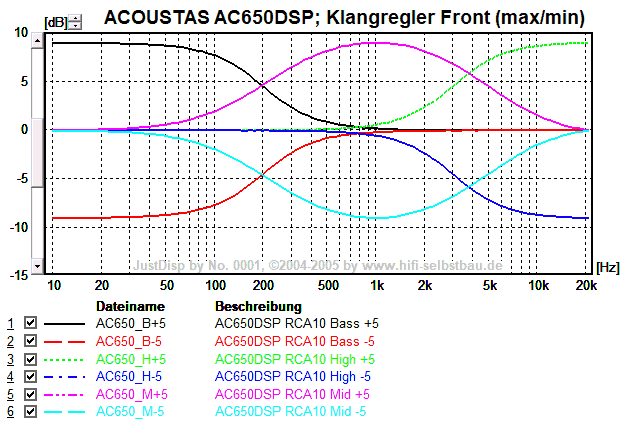
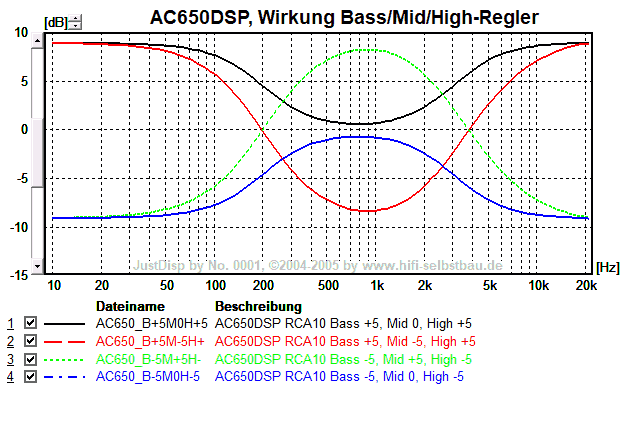
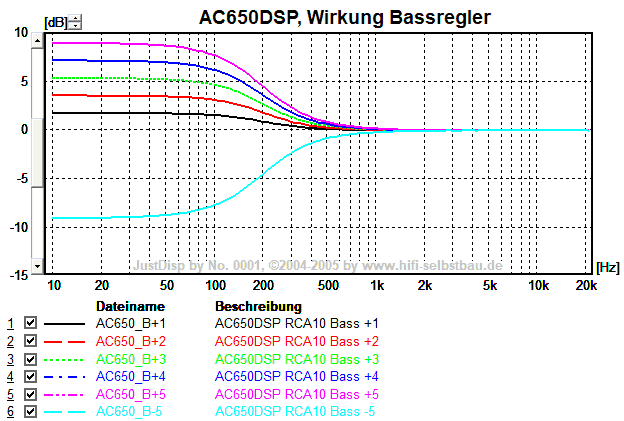
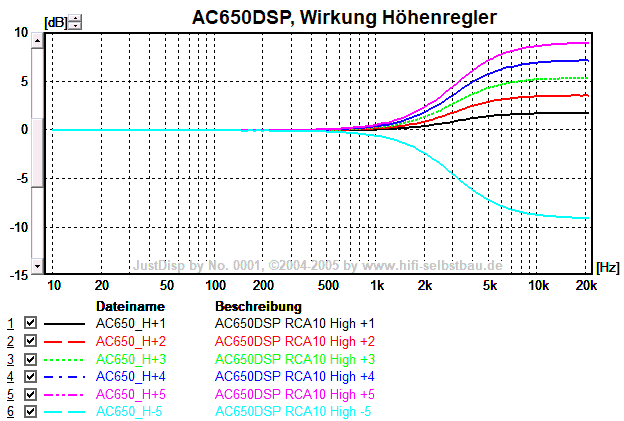
All positions of the three controls are detented, and the center position is marked. Each detent changes the level by 1.8 dB; intermediate positions are not possible. The bass and treble knobs are so-called shelving filters with midpoint gain frequencies (the frequency at which half the boost or cut in dB is achieved) of 200 Hz and 3 kHz, respectively, and a Q factor of 0.58. The midrange (Mid) knob is a parametric equalizer (PEQ for short) with a center frequency of 1 kHz and a Q factor of 0.2 - all in all, a "gentle" sound correction.
Tone controls in AirDSP:
In addition to these "hardware" tone controls on the front panel, there are 5 "software" tone controls in the "Control" section of the AirDSP software. The "Bass" and "High" bands are again implemented as shelving filters with midpoint gain frequencies of 200 Hz and 9.0 kHz, respectively, and a Q factor of 0.4. The three middle bands are implemented as PEQs with center frequencies of 430 Hz, 3.0 kHz, and 6.0 kHz and a Q factor of 0.2.
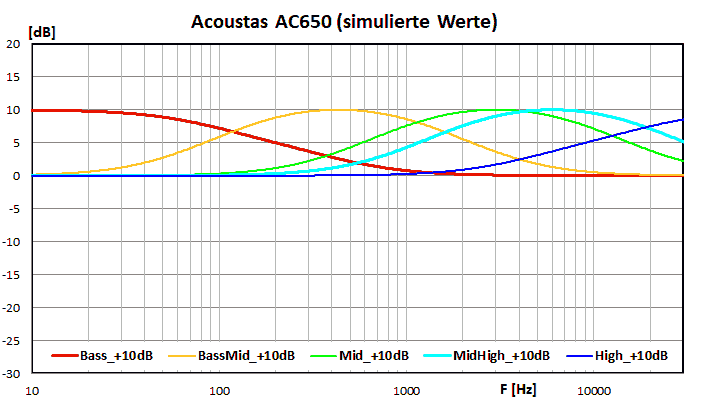
The hardware and software tone controls therefore have different characteristics (Q value) and, in some cases, different midrange frequencies. The 5 software tone controls - along with the other settings - are saved in the setup; the hardware tone controls are not included in this (since they are intended for "spontaneous" sound adjustments).
Channel Distribution Matrix:
Until now, all settings (Volume, Tone (Front), Tone (App)) have affected both input channels equally. Now we come to the point where the processing of each individual channel differs. To do this, you must specify the following for each of the 10 channels:
- which input channel to use (L = left, R = right, or C = average of both)
- whether this channel should be muted
- whether this channel should be "inverted" = rotated 180° in phase (= invert)
- whether this channel should be attenuated -> Gain = -X dB (adjustment range = up to -60 dB in 0.25 dB steps)
- whether this channel should be delayed -> Delay (here, multiple units can be selected: ms, in, ft, mm, or m)
For the delay, the adjustment ranges and resolutions vary depending on the selected unit:
| Unit | Range | Resolution |
| ms | 0 - 50 ms | 0.1 ms |
| in | 0 - 12 in | 1/8 in |
| ft | 0 - 56 ft (4 levels) | 1/8 in |
| mm | 0 - 305 mm | 1 mm |
| m | 0 - 17.15 m (4 steps) | 0.01 m |
However, in terms of hardware, only delays of whole sample values are possible - which, depending on the sampling rate, would be:
| Sampling rate | 1 sample = ? ms | ? in | ? mm |
| 48 kHz | 0.021 ms | 0.281 in | 7.15 mm |
| 96 kHz | 0.010 ms | 0.141 in | 3.57 mm |
| 192 kHz | 0.005 ms | 0.070 in | 1.79 mm |
AirDSP then apparently takes the next possible number of integer samples . . . In v1.2.15, input values (e.g. 10 mm) will be rounded to integer samples and displayed accordingly (e.g. as 7 mm).
Filter:
Butterworth and Bessel (6, 12, 18, 24, 30, 36, 42, and 48 dB/octave each) and Linkwitz-Riley (12, 24, 36, and 48 dB/octave) are available as IIR low-pass and high-pass filters. Butterworth and Bessel filters are standardized such that the level drops by 3 dB at the specified cutoff frequency" for Linkwitz-Riley filters, the drop is 6 dB. This behavior is common in many DSP systems; the Generic EQ in REW also behaves this way. In earlier versions, this was not yet the case for Bessel filters - as can be seen in the very detailed external measurement report from Willow Electronics Labs on page 75 and following.
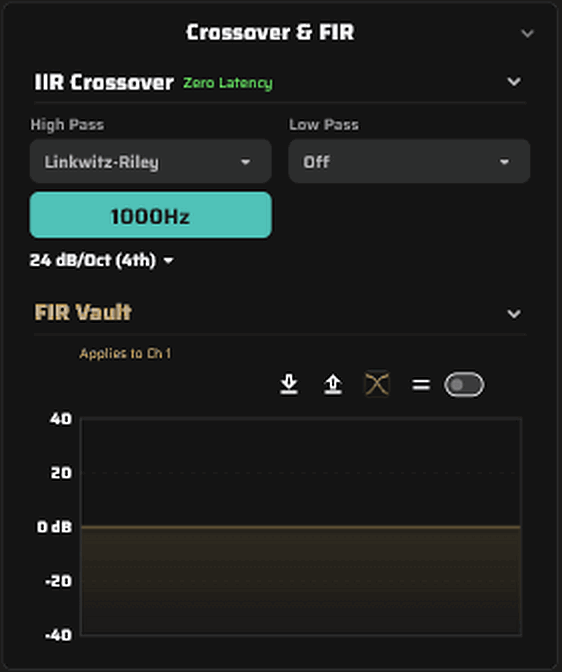
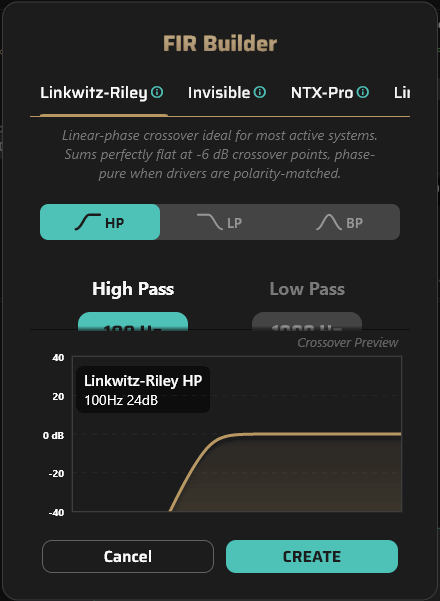
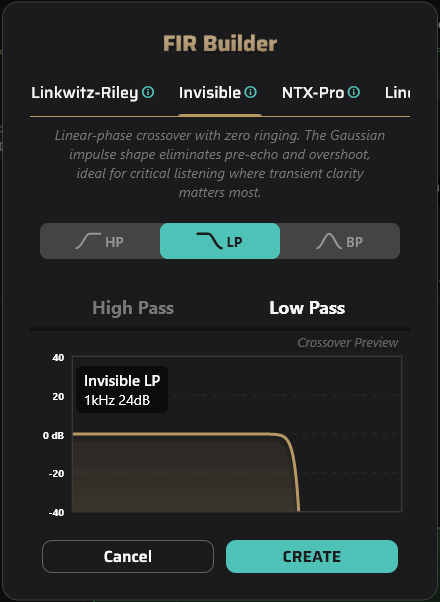
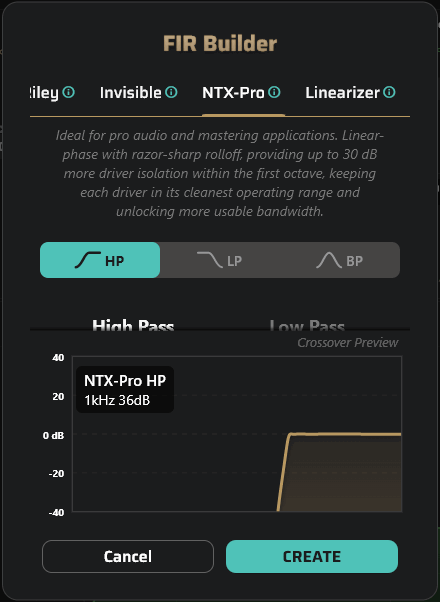
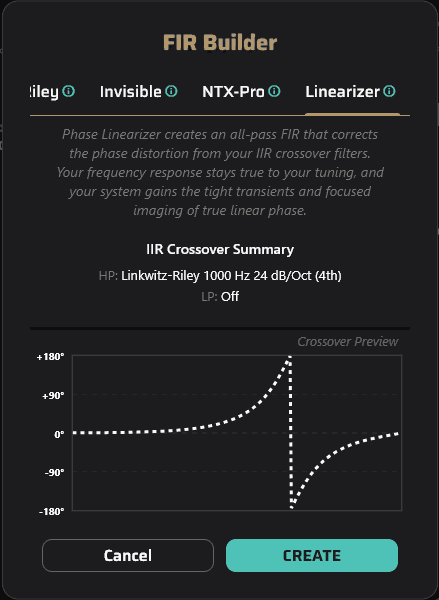
The available FIR filters include Linkwitz-Riley (12, 24, 36, and 48 dB/octave), Invisible (12, 24, 36, and 48 dB/octave, similar to Butterworth), NTX-Pro (36 and 48 dB/octave), and Linearizer are available as FIR filters, with the latter compensating only for the phase shifts of IIR filters. At least, that`s what AirDSP`s built-in help says (when you click the (i) icon next to the respective filter):
Alternatively, "external" FIR coefficients (e.g., those created with rePhase) can be loaded using the "Import-FIR" icon. The data must be provided as a text file with one coefficient per line and a maximum of 1,500 lines. The decimal separator must be ".".
Equalizer:
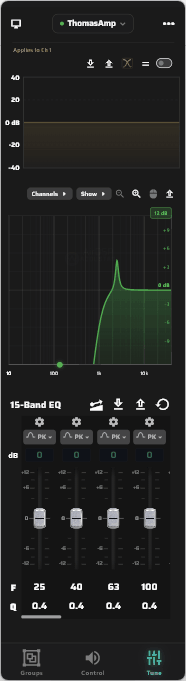
In addition, a 15-band equalizer is available for each channel. On a smartphone, only 5 bands are visible at a time, and you may need to swipe to the side; on a PC/laptop and tablet, it looks like this:
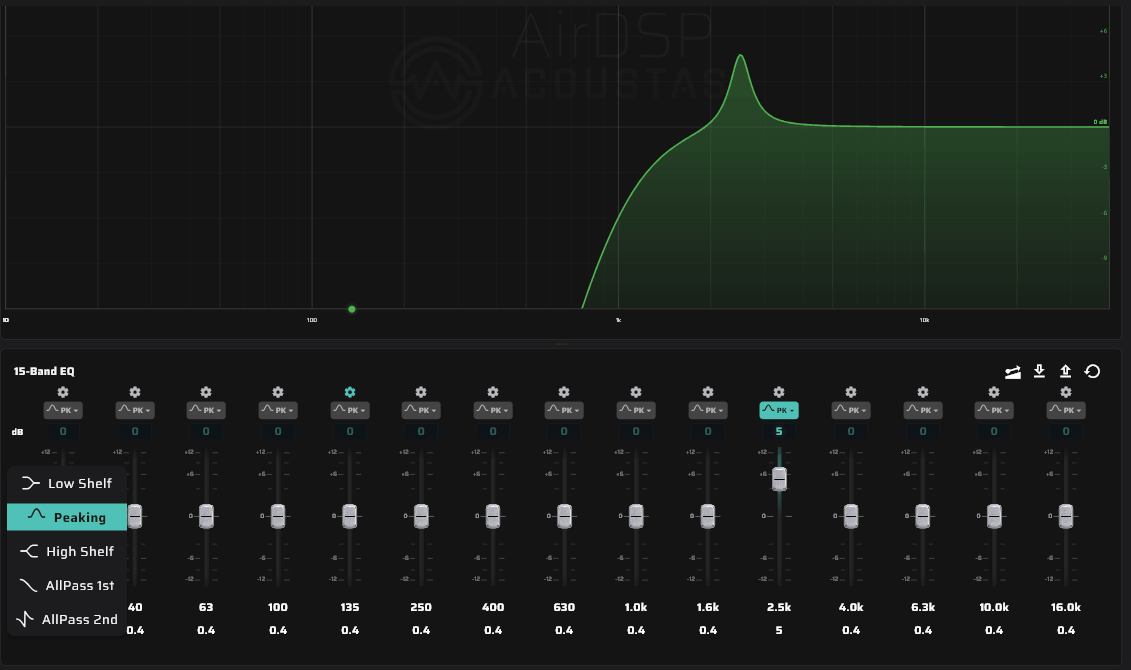
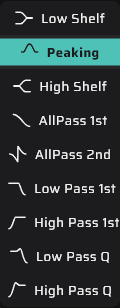
Each band can be defined as Low Shelf, Peaking, High Shelf, Allpass 1st, or Allpass 2nd. Starting with version v1.2.14+40, the following have been added (right image):
| Low Pass 1st | Low-pass 6 dB/octave |
| High Pass 1st | High-pass 6 dB/octave |
| Low Pass Q | Low-pass 12 dB/octave with variable Q |
| High Pass Q | High-pass 12 dB/octave with variable Q |
The adjustment ranges are:
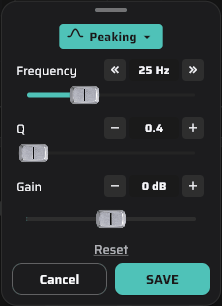
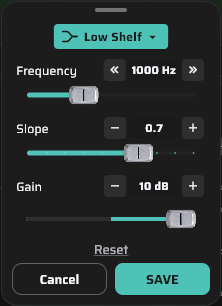
- Frequencies from 10 to 20,000 Hz in 1 Hz increments
- Level (Gain) from -12 to +12 dB in 0.25 dB increments
- Q from 0.1 to 10 in 0.01 increments (in version 1.2.15, shelving filters can only be set to Q values up to 1.0)

Using the 4 icons in the upper-right corner, you can sort the EQs by ascending frequency, import them (more on that later), export them, or reset them all.
If you click the gear icon at the top of each band, a dialog box opens that may be a little less fiddly to use (for people with thick fingers on a smartphone ;-)):
Changing the sample rate:
Many DSP systems operate internally at a sampling rate of 48 kHz because this keeps the processor load low: double the sampling rate = double the processor load. Some DSP systems operate internally at 96 kHz (e.g., miniDSP); the HYPEX FusionAmps operate internally at 93.75 kHz.
The ACOUSTAS AC650DSP operates internally at 48 kHz by default and allows the use of FIR filters with 1,500 taps per channel across 8 channels -> "FIR Profile". Optionally, it can also operate internally at 96 kHz (" Rich Profile") or even 192 kHz ("Pure Profile") but in that case without FIR filters, since these would need to have twice (Rich) or four times (Pure) as many taps to maintain the same frequency resolution, and the DSP, with its 10 channels, would be overwhelmed. With the "Pure Profile", the assignment between input and output channels is also predefined.
I hadn't figured out on my own where to switch the sampling rate, so I had to ask ACOUSTAS first. That's because there's no manual for either the AC650DSP or AirDSP. AirDSP only has a "built-in" help section and "tooltips". I had looked in the "..." menu, but the menu item "Reprogram Amp..." sounded "dangerous", it couldn`t possibly be for changing the sampling rate, could it? Well, it could! And the name is actually accurate, because when you change the sampling rate, the AC650DSP completely loses its memory!!!
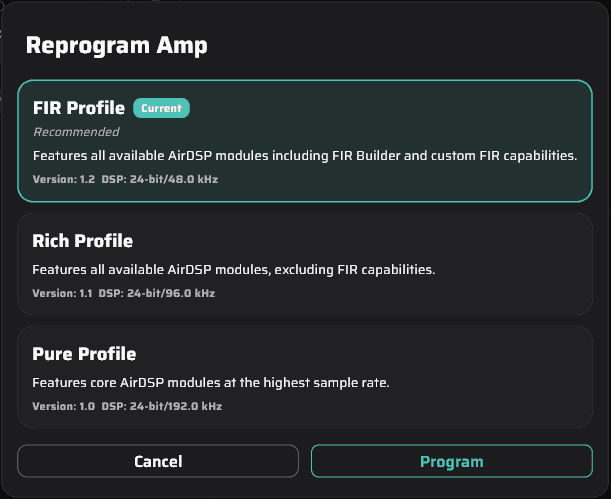
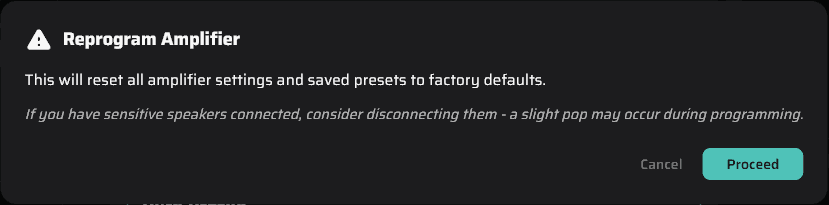
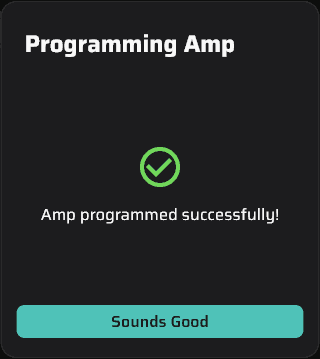
So it makes sense to first save the current state of the entire amplifier using "Export Amp State..." and, if necessary, reload it after changing the sampling rate ("Import Amp State...") though the FIR coefficients may be lost in the process. It`s also recommended to unplug the speakers, as "pop" noises may occur during reprogramming. The entire process takes a while, so a quick comparison between two profiles isn`t possible this way.
Connection to the AC650DSP:
That covers the features of the AC650DSP and AirDSP combination for now. But how do you actually connect to the AC650DSP? The device comes with only very basic instructions (see AC650 Getting Started Guide V2). Apparently, you first need to install the AirDSP software. There are links for this on the (see AirDSP homepage). When you launch the software for the first time, it should look like this:
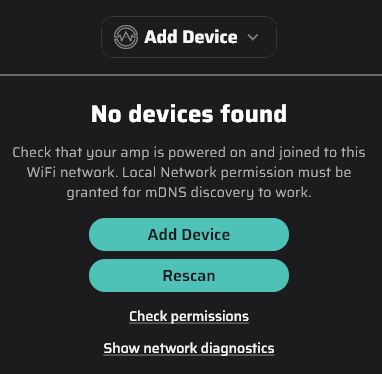
Sure, the amplifier has to be turned on. But how do I get it to join this Wi-Fi network? A rescan doesn`t help either. Clicking "Check permissions" doesn`t do anything (at least for us). And I can`t make heads or tails of "Show network diagnostics" either . . . All right, then I`ll just add a device ("Add Device"):
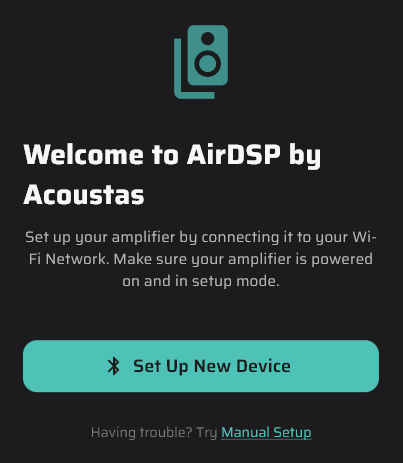
OK, I`ll click "Set Up New Device" . . .
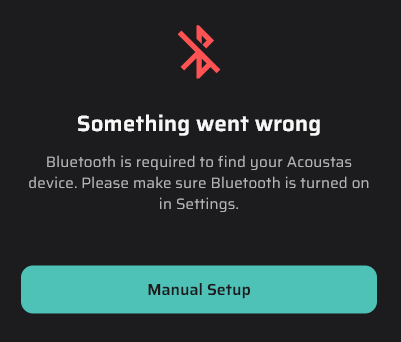
Darn, my laptop doesn`t have Bluetooth (it worked with my cell phone) . . .
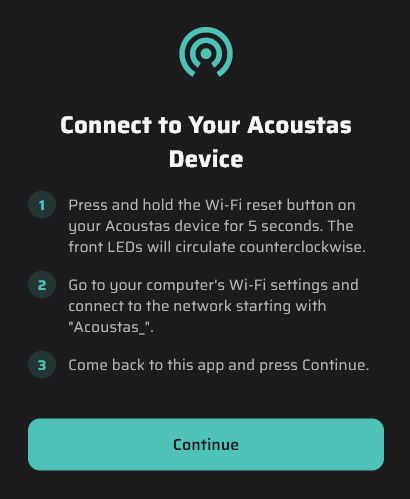
No problem: press the Wi-Fi reset button on the back of the AC650DSP for 5 seconds, find the network named "Acoustas_*" in the Wi-Fi settings, and click "Continue" . . .
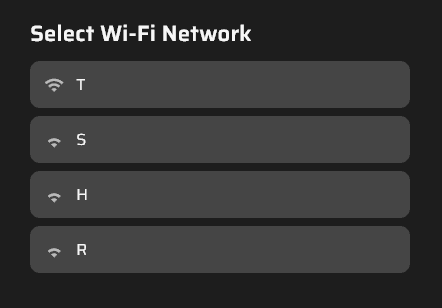
Now select your "own" Wi-Fi network and enter the network key (this is usually the combination of numbers on the bottom of the router). That`s how I got it to work manually. Our music PC doesn`t have Wi-Fi, so you have to "convince" the router. There are a few tips for this at the end of "Show network diagnostics.".
It`s interesting to note that you can access the AC650DSP with more than one device: for example, if you`re developing on your laptop, you can simultaneously use your smartphone (if it`s on the same Wi-Fi network) to adjust the volume or mute individual drivers/channels, etc. This not only changes the volume on the AC650DSP, for example, but also the corresponding slider in the AirDSP software on the laptop.
There is one catch, however: if you want to change the setup, you can ONLY do so on the device that already has the setup you want to load! This means that setups are NOT automatically synchronized between different devices. ACOUSTAS plans to improve this feature, though. For now, the only solution is to use an ONLINE storage solution accessible to all involved devices (e.g., NAS, OneDrive, etc.).
Outlook:
In the second part of our test, we will use the ACOUSTAS AC650DSP to drive a 3-way loudspeaker. We have already described the basic procedure in our article The RTA Module in REW. We will focus specifically on the aspect of "transferability of DSP settings". We will also describe the "correct" use of the FIR "Linearizer" feature and share our listening impressions - including the comparison to a correction with Dirac Live Room Correction . . .